 EN


A chisel is one of the most essential hand tools in woodworking, prized for its precision, versatility, and ability to create clean, controlled cuts. Whether you are removing waste material, cutting joints, or performing delicate carving work, a chisel performs tasks that power tools simply cannot match. However, the effectiveness of any chisel depends entirely on one critical factor: sharpness. A dull chisel not only produces inferior results but also requires excessive force, leading to poor control, safety risks, and frustrated craftsmanship. Understanding how to maintain your chisel through proper sharpening and learning the correct techniques for using it will transform your woodworking from frustrating to rewarding.
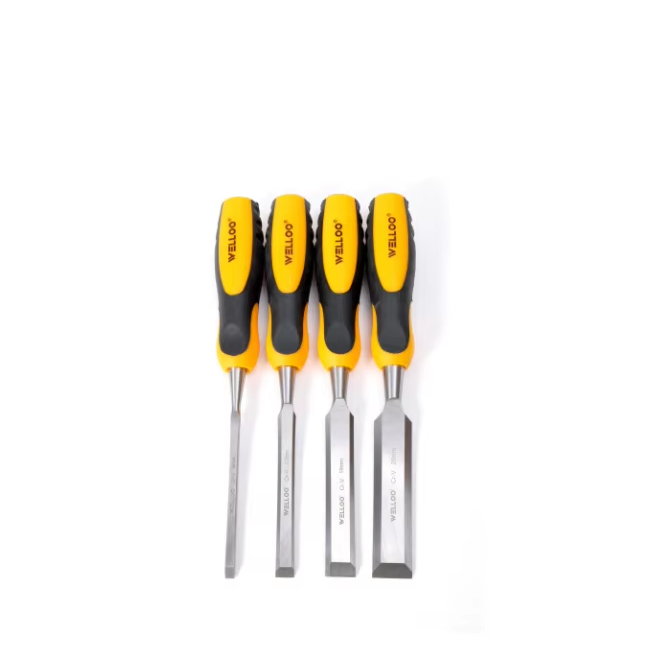
Mastering the art of the chisel requires knowledge in two equally important areas. First, you must understand the science and practice of keeping your chisel sharp, which involves selecting appropriate sharpening stones, understanding angles, and developing muscle memory. Second, you need to learn proper technique for wielding the chisel safely and effectively across different woodworking applications. This comprehensive guide will walk you through both aspects, whether you are a beginner picking up your first chisel or an experienced woodworker looking to refine your approach.
The Importance of Sharpening Your Chisel
Why Chisel Sharpness Matters
A sharp chisel is the foundation of quality woodworking. When your chisel is sharp, the blade glides through wood grain cleanly, creating precise edges and smooth surfaces. A dull chisel, by contrast, tears grain, requires excessive pressure, and often skips across the wood surface unpredictably. The difference is not merely aesthetic. A dull chisel is dangerous because you must apply force to compensate for the lack of sharpness, increasing the risk of slipping and injury. Additionally, when you work with a sharp chisel, you achieve better fit in joints, cleaner mortises, and more professional-looking finished work.
How Chisel Sharpening Impacts Your Workflow
Investing time in keeping your chisel sharp actually saves time overall. While sharpening takes minutes, the improved cutting efficiency and reduced need for sanding or rework means you complete projects faster and with better results. A properly maintained chisel also lasts much longer because you are not forcing it through material, which stresses the metal and causes dulling. Many woodworkers discover that spending five minutes sharpening their chisel before starting a project is the best investment in quality they can make. Your chisel becomes an extension of your skill rather than a frustration.
Mastering Chisel Sharpening Techniques
Selecting the Right Sharpening Stones for Your Chisel
The foundation of sharpening your chisel begins with choosing appropriate sharpening stones. Whetstones come in various grits, from coarse stones that remove significant material quickly to fine stones that create a razor edge. For maintaining your chisel, you typically need at least two stones: a medium-grit stone around 1000 grit for general sharpening, and a fine-grit stone around 4000 to 8000 grit for the final edge. Some woodworkers prefer water stones for their speed, while others favor oil stones for their longevity. When selecting stones for your chisel sharpening routine, consider your workshop space, budget, and whether you prefer natural or synthetic stones. Quality matters significantly because a worn or uneven stone will not sharpen your chisel effectively.
Understanding the Correct Sharpening Angle for a Chisel
The bevel angle of your chisel is critical and typically ranges from 25 to 30 degrees. This angle must be maintained consistently during sharpening for your chisel to cut properly. Most woodworkers use a honing guide, a mechanical tool that holds your chisel at the precise angle against the stone, ensuring consistent results. Without a guide, maintaining a steady hand angle requires significant practice and skill. When you sharpen your chisel using a honing guide, you eliminate guesswork and achieve uniform results across all your chisels. The angle affects how the chisel performs: a slightly lower angle cuts more smoothly, while a slightly higher angle provides durability for tougher work. Once you establish your preferred angle, keep your chisel consistent at that angle for predictable performance.
The Step-by-Step Process for Sharpening a Chisel
Begin sharpening your chisel by wetting your medium-grit stone and placing it on a stable work surface. Secure your chisel in the honing guide at your chosen angle, then position the blade on the stone with light downward pressure. Move the chisel forward and backward across the stone in smooth, controlled strokes. After about ten to fifteen strokes on the medium stone, examine your chisel blade under strong light to see if a uniform wire edge forms along the entire cutting surface. This indicates your chisel has reached the medium-grit stage. Then transfer your chisel to the fine-grit stone and repeat the process, using fewer strokes until the wire edge disappears and your chisel gleams with a polished appearance. Finally, use a leather strop or stropping compound to remove the final wire edge and achieve maximum sharpness. Your chisel is now ready for precise work.
Proper Techniques for Using Your Chisel
Holding and Controlling Your Chisel
Proper grip and control fundamentally affect your success with a chisel. Hold your chisel with your dominant hand gripping the handle firmly but not tensely, with your thumb and fingers positioned behind and to the sides of the handle for control. Your other hand should guide the back of the blade lightly with your fingers and thumb, never placed in front of the cutting edge. Keep your elbows low and close to your body to maintain stability and control. When you use your chisel this way, you can feel the blade responding to wood grain and adjust pressure accordingly. Many woodworkers find that a slightly angled stance, with your body at about 45 degrees to the workbench, allows natural arm movement and reduces fatigue. Your chisel should feel like an extension of your arm, responsive and under complete command.
Common Chisel Applications in Woodworking
Your chisel serves multiple essential functions across different woodworking tasks. When cutting mortises, a chisel precisely removes waste material between knife marks, creating rectangular holes for joinery. For paring, light cuts refine surfaces and fit joints perfectly. When cleaning up saw marks or shaping components, a sharp chisel works faster and cleaner than sandpaper alone. Many woodworkers use their chisel for back-beveling chair legs or table aprons, creating subtle details that enhance both appearance and function. In carving applications, a chisel becomes an artistic tool, allowing detailed ornamentation and sculptural work. The versatility of a chisel means you will reach for it constantly, making its maintenance essential. Each application demands slightly different technique, but proper sharpening is universal across all uses.
Safety Considerations When Working With Your Chisel
Working safely with your chisel prevents injury and improves your work quality. Always ensure your work is secured firmly to the bench, never relying on hand pressure alone to hold it in place. Direct the cutting edge away from your body and hands at all times, keeping both hands behind the blade. Maintain sharp focus on your work and never become distracted while wielding your chisel. If you feel the chisel beginning to slip or bind, stop immediately rather than forcing it. Clean sawdust frequently so you can see your work clearly and maintain control. When not actively using your chisel, place it safely on the bench with the blade edge pointing away from the work area. Respecting your chisel as a precision tool rather than an expendable implement fosters the mindset that produces both excellent work and injury-free woodworking.
FAQ
How often should I sharpen my chisel?
The frequency of sharpening your chisel depends on usage intensity and wood type. If you use your chisel daily on hardwoods, sharpen it every few days. For casual woodworkers or those primarily working softwoods, weekly or even monthly sharpening may suffice. The key indicator is performance: when your chisel begins requiring extra pressure or producing torn grain, it is time to sharpen. Many woodworkers maintain a quick stropping routine between major sharpening sessions, which keeps their chisel sharp between full stone sessions.
Can I use a bench grinder to sharpen my chisel?
While a bench grinder can quickly remove significant material from your chisel, it generates intense heat that can damage the temper of the blade if you are not careful. For complete rehoning of a badly damaged chisel, a grinder may be appropriate, but for regular maintenance sharpening, whetstones are superior because they allow precise angle control and avoid heat damage. Many experienced woodworkers reserve their chisel grinder work for repairs only, relying on whetstones for their routine sharpening needs.
What is the difference between a paring chisel and a mortise chisel?
A paring chisel features a longer, thinner blade designed for controlled, light cuts and detail work, making it ideal when you need finesse and precision with your chisel. A mortise chisel has a thicker, shorter blade built to withstand the heavy impacts and prying forces required when chopping deep mortises. Each chisel type performs best within its intended purpose, so many woodworkers maintain both types in their toolkit to match specific tasks with the appropriate chisel.